Select Page
Home Health Equipment for Therapists – The Ultimate Guide

Home Health Equipment for Therapists – The Ultimate Guide

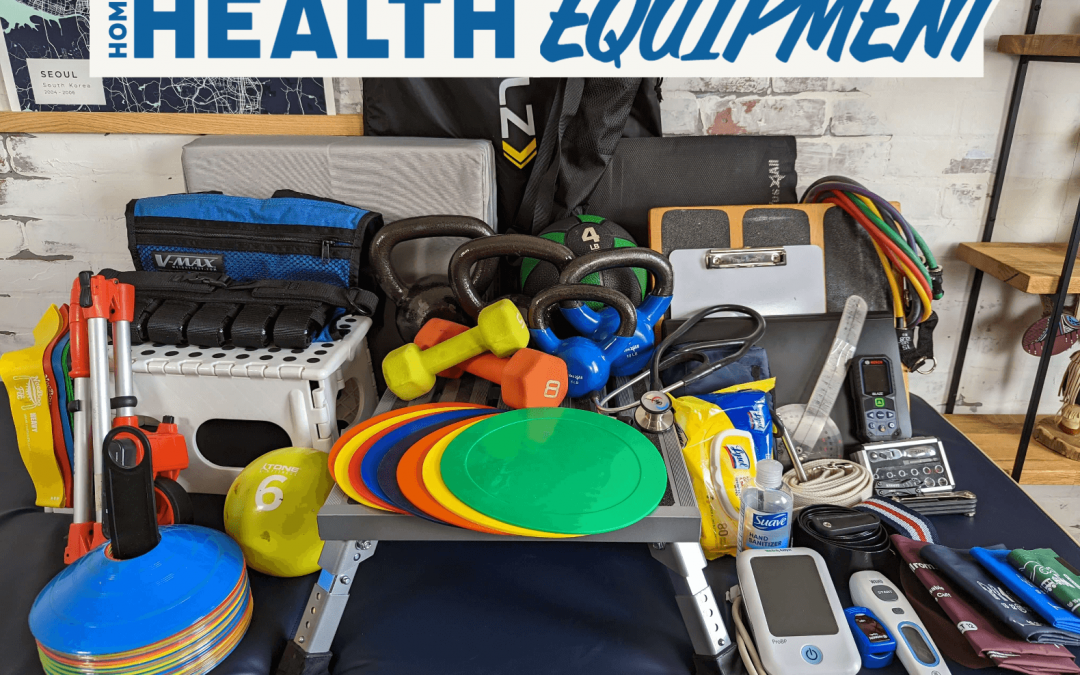
Having the correct equipment to do your job is fundamental as a home health therapist. There are tools that are an absolute necessity in addition to tools that are good to acquire slowly as you go along. I’ll divide basic home health tools into three separate groups. The first group is basic items that every home health physical therapist needs to do the bare minimum job. Without these items, you won’t be able to provide appropriate and safe care. The other two groups are items that provide additional functionality and allow you to expand your interventions to provide more optimal care for your patients. I’ll also go over the equipment necessary to perform outcome measures quickly and accurately in the home.

What Basic Equipment is Needed for Home Health Therapy?

The basic tools necessary for a therapist in home health include a pulse oximeter, a validated blood pressure machine in addition to a sphygmomanometer as a backup method, a stethoscope, a thermometer, a goniometer, a gait belt, a reflex hammer, cleaning supplies, sanitation products, a measuring device, batteries, a file organizer or clipboard with storage, a pen, bag barriers, PPE, a home health bag, and resistance bands.

Where do you Get Home Health Tools?

As a full-time employee, you will likely be provided with many of these items, but if you are not, you will need to purchase them yourself. Additionally, your agency may provide you with items that are substandard, in which case you may request new equipment. If your agency refuses to provide appropriate equipment you may need to purchase some items on your own. Ultimately, these are mostly one-time costs that may be tax-deductible. Consult your tax professional.

As a part-time or PRN employee, you likely won’t be provided with many of these items and will need to obtain them on your own.

How do you know if your Home Health Equipment is Medical Grade?

When selecting equipment for taking vital signs, not all equipment is equal. There are a variety of brands and types to choose from so how do you know what’s appropriate? Let’s take a closer look at some of the more critical items in the section. As a medical professional, you should be using medical-grade equipment.

What is the Best Pulse Oximeter for Home Health?

When it comes to pulse oximeters there is a variety to choose from on Amazon, but many of those do not do as well with darker skin pigmentation. My recommendation is a Masimo MightySat or a Nonin Vantage 9590. Both of these are considered medical grade and not only handle various skin pigmentation more accurately but are faster at obtaining accurate O2 saturations when it’s important to understand your patient’s ability to adapt to exercise and movement. The Masimo has an optional respiration rate monitor that is very helpful while the Nonin is more durable and is built in the USA. While either one is suitable, I prefer the durability and reliability of the Nonin Vantage 9590 in addition to the lower cost.

What is the Best Blood Pressure Monitoring Device for Home Health?

You may have heard that manual blood pressure taking is more accurate than a machine, but that is not supported by the evidence and there is no stipulation to take blood pressure manually by the Centers for Medicare and Medicaid Services (CMS). I only take blood pressure manually as a backup and that is very rare. The most important consideration when choosing a blood pressure monitoring device is that it is a validated device. Head on over to validatebp.org to find a device that works for you. After trying 5+ devices, I’ve found the Welch Allyn ProBP 2000 and a variety of extra cuffs to be the best option. This unit typically takes BP in less than 20 seconds which helps those who are sensitive to the pressure, it is extremely well made, and in combination with extra cuffs, you can take blood pressure accurately for a variety of patients. The Student Medical Shop tends to have the best pricing and fast shipping.

What is the Best Thermometer for Home Health?

When purchasing a temporal thermometer it’s important to confirm the device is FDA “cleared” as a baseline. A touchless device is preferable to reduce contact between patients. The Wand – No Touch Forehead Thermometer by ThermoWorks is an excellent option for its durability, ease of use, large screen, and ability to change between Fahrenheit and Celcius. 

Keep in mind that your agency should have a process in place to confirm the accuracy of all vital sign equipment every year.

What is the Best Gait Belt for Home Health?

Using a fabric gait belt repeatedly between patients is unsanitary. The use of a wipeable gait belt is important to reduce the risk of infection transmission between patients. There are a variety of options available, but I prefer the Posey EZ Clean gait belt due to the ease of cleaning and good clamp strength to hold the belt in place.

Basic Equipment for Outcome Measures

To properly assess your patients, you should have the necessary equipment to accurately complete objective outcome measures. Starting with a few basic items, you should be able to perform multiple valid measures.

The most fundamental tool for outcome measure assessment that a therapist should have is a laser measure. It is the fastest, most accurate way to measure distances for the timed up and go, Tinneti-POMA,  2 or 6-minute walk test, the short physical performance battery, and others. It’s compact and lightweight so doesn’t take much room in your bag and it is much faster to use than a measuring tape and more accurate than a measuring wheel. I’ve tried a variety of options, but the one I prefer is the Bosch Blaze Pro GLM165-25G. It provides a live measurement, is durable, and is highly accurate. Some others require you to press a button to find distance each time which tends to be much less convenient. 
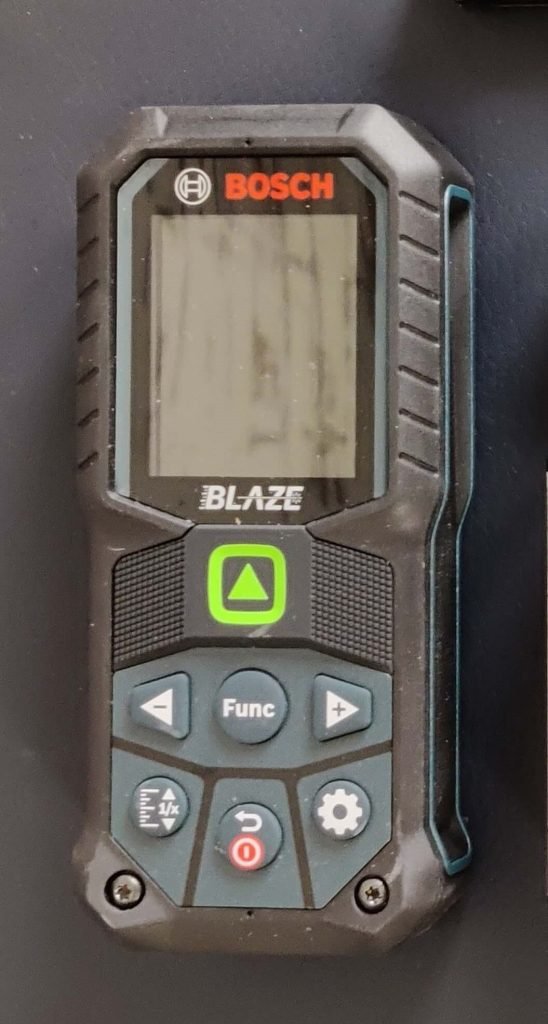
Bosch Laser Measure for home health

For measuring ambulation distance, especially outside, a good rolling measure such as the Komelon ML1212 which is collapsible and has a small 4” wheel is an excellent option.

With just these items you should be able to perform the following outcome measures: 5xsts, 30” CST, 2-minute step test, 2-minute walk test, 6-minute walk test, gait velocity, TUG, SPPB, and the Tinetti-POMA.

Upgrade 1 – Home Health Equipment for the Experienced Therapist

Once you’re established and have the basic equipment needs, the following items are a good next step. Round out your assessment tools with a monofilament for checking protective sense related to neuropathy. Some may consider these as a need in the basic setup, but realistically they are items not used that frequently. Additionally, if your agency has not provided one, a portable scale is helpful, especially for patients with congestive heart failure. It’s also a necessity if you will be completing OASIS documentation. I’ve found that getting a small portable scale, like the Triomph Ultra Slim, in combination with a laptop case is a very handy way to travel with the scale.

At this point it will be good to have one or more additional gait belts in the event you need additional points of control, to help lift someone from the floor, or to use as a guard when patients are ambulating with heavier weights.

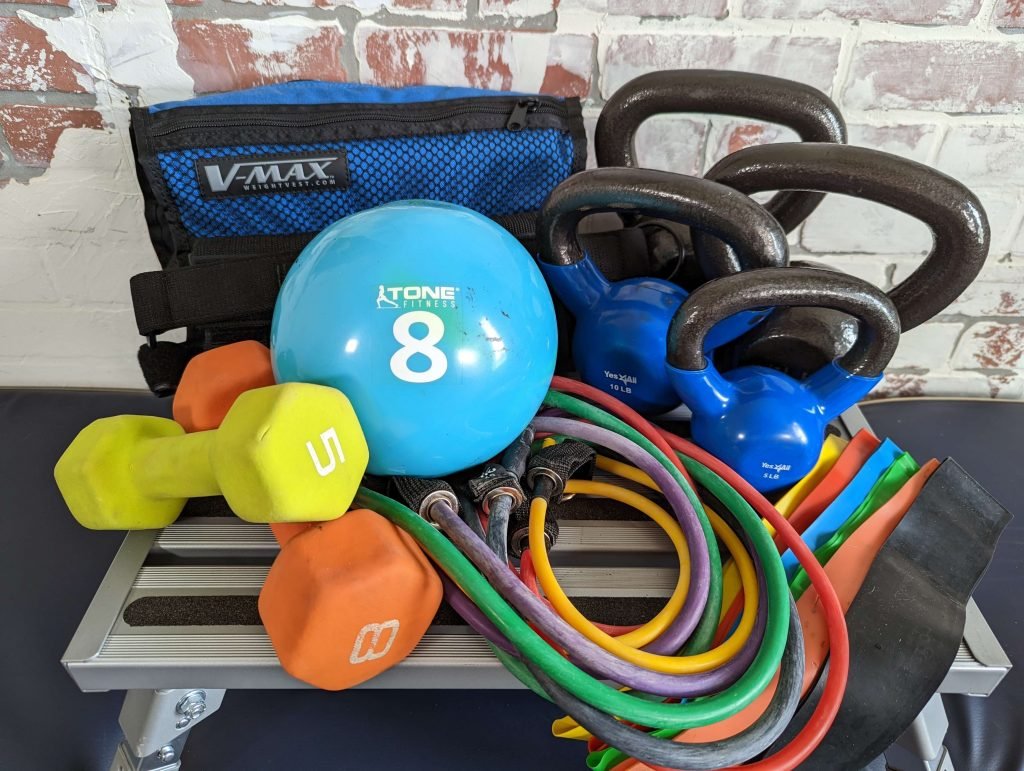
Appropriate dosing in-home health has long been an issue and if you’d like to ensure your patients get the most from your interventions, this is a good time to buy some basic weights. Dumbbells or kettlebells ranging from 3 to 15 lbs are a good place to start. In the event you feel someone only needs 1-2 lbs of resistance, you can always use items in the patient’s home. 
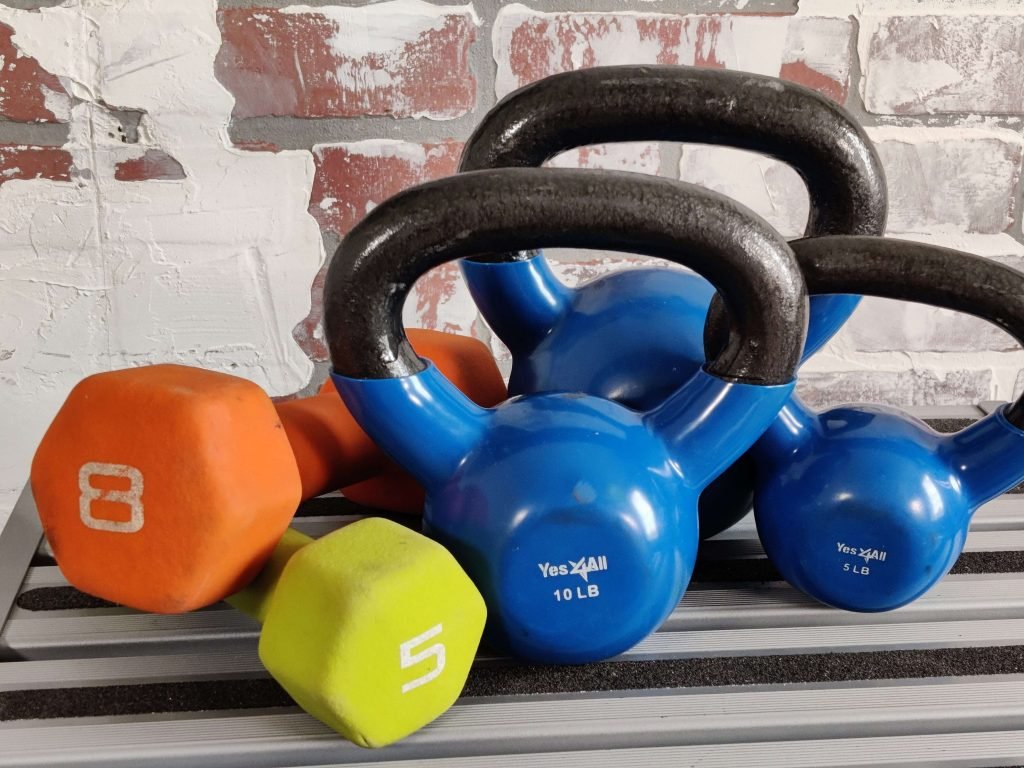
Dumbbells and kettles to add resistance to home health exercises
Dumbbells and kettlebells

I’ve found it helpful to list out the plan for a given day so the patient knows what to expect at the beginning of each visit. It only takes a minute or two but can help the patient to feel accomplished and keep the session moving. This can be done with a dry-erase clipboard and marker. The clipboard is also helpful for filling out forms or assessments.

Equipment to help with home health maintenance

There are times when simple maintenance of assistive devices is needed to improve patient safety. This is typically to tighten brakes on walkers and wheelchairs. It just takes a couple of minutes but can be the difference in preventing a fall. The Sunex 9723 socket set is compact and works great for adjusting brakes on wheelchairs. A small multitool such as the Gerber Gear Dime Mini is just what’s needed for adjusting brakes on a 4-wheeled walker. A good hex key set is also needed at times to adjust parts of walkers and wheelchairs.
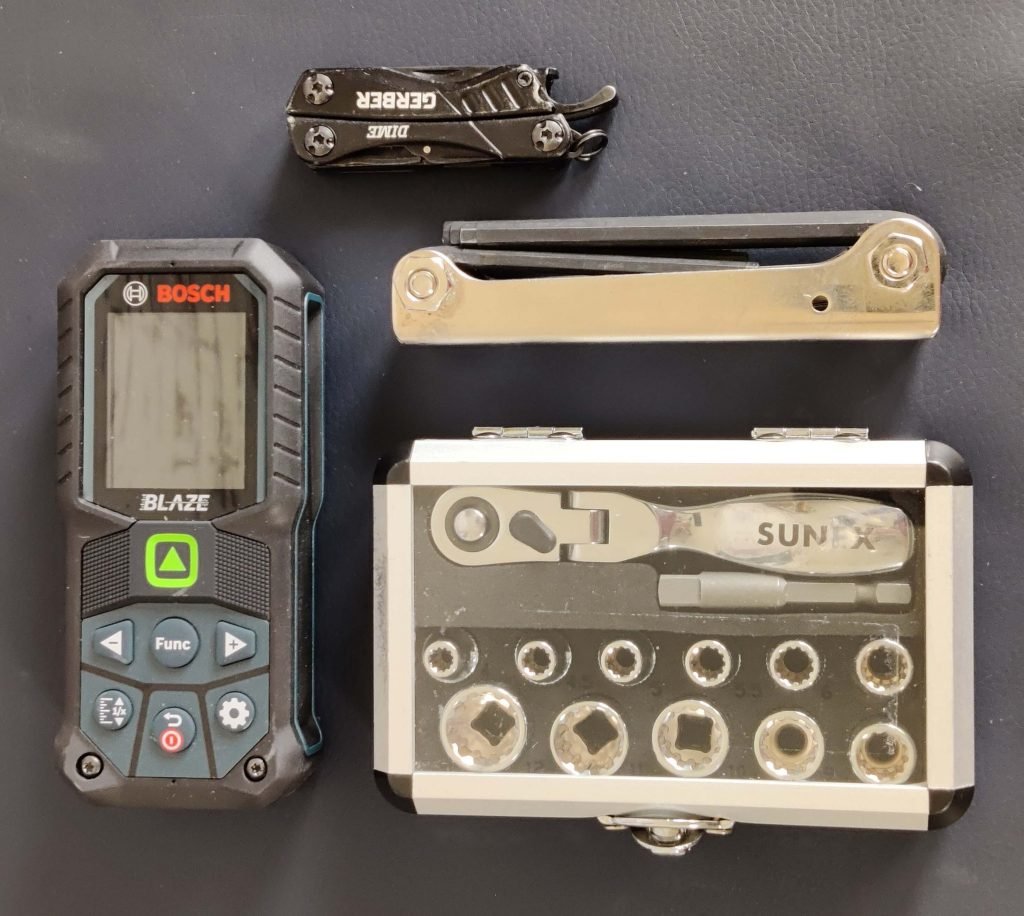
Tools to fix assistive devices in home health
Bosch Blaze Pro GLM165-25G, Gerber Gear Dime Mini, Sunex 9723 socket set, hex key set

Upgrade 2 – Home Health Equipment for the Expert Therapist

Equipment for Agility and Balance

To finish out your home health equipment set-up, here’s the final group of items you should add. Cones and spot markers are great for agility and navigating obstacles. A balance pad and rocker board help address ankle and hip reaction deficits for balance. Hurdles and an agility ladder are other great tools for improving coordination and safety with obstacle navigation.
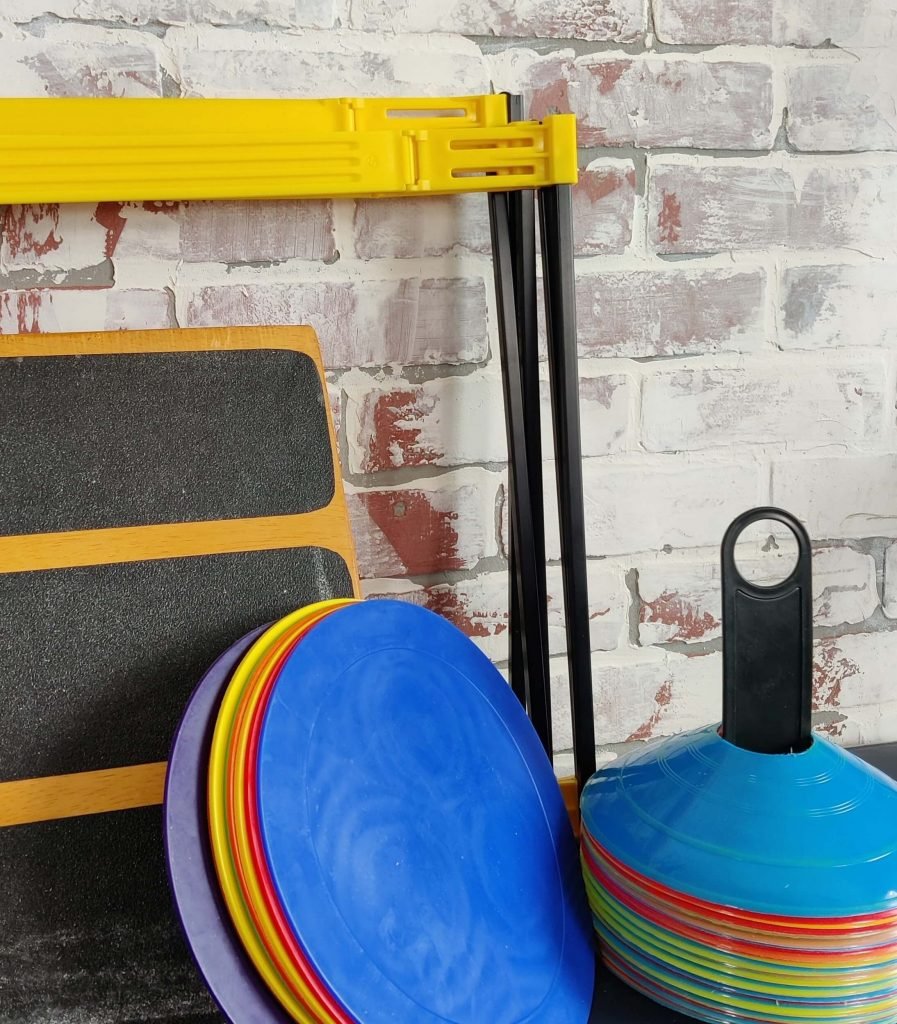
Balance and agility tools for home health

Equipment for Building Strength

Weighted balls help to add resistance to pressing and lifting movements while making the intervention more interesting and engaging. At this point, you’ll also want to consider expanding your weights to include dumbbells or kettlebells up to 30 lbs. It’s important to understand the tasks your patient might have to do daily and ensure they can safely exceed the requirements of that task. For example, if they need to lift a 20lb basket of clothes to do the laundry, you’ll want to make sure they can lift at least 30 lbs. If they are only able to lift 20 lbs safely, they’ll be working at their maximum exertion each time they need to complete that task.

The last item you should consider adding to your home health supplies as a therapist is a high-quality adjustable weight vest. This 25lb V-MAX weight vest from weightvest.com is made in the USA of high-quality material and should last many years. Adding a weighted vest while working on gait, obstacle avoidance, balance, and agility, is an excellent way to add resistance and build functional capacity with your patients.

Consider also investing in some bodyweight suspension trainer straps. These can be easily used in homes to incorporate full-body workouts. You may also consider getting a laser level you can use to help improve step length for your patients with Parkinson’s disease.

Considerations for Home Health Therapy Equipment

While some choose to not buy any equipment at all, if you want to properly dose and challenge your patients so they can reach their maximum potential, it’s important to have the appropriate gear. Bought slowly over time, it’s easy to put together the items on this list and your patient outcomes will benefit significantly.

All equipment that comes into contact with the patient should be wipeable. At times, you may need to place a barrier between the equipment and your patient to meet sanitation standards. Equipment for taking vitals should be checked for accuracy by your agency on an annual basis.

Outcome Measure Equipment for Home Health

Aside from the Bosch Blaze Pro GLM165-25G and Komelon ML1212 noted in the basic items setup, the following are items that are required for the associated outcome measures. A small set of cones can be used for assessments that require starting, end, or turning points.

What Equipment is Needed for the Arm Curl Test?

The Arm Curl Test requires a 5lb dumbbell for women and an 8lb dumbbell for men.

What Equipment is Needed for the 4-Square Step Test?

For the 4-square step test, you’ll need either 4 canes or pipes laid out in a plus sign. For less than 10$ you can get the necessary pipe and connectors from a home improvement store. Pair that with a convenient trekking pole storage bag for easy portability.

What Equipment is Needed for the Mini BESTest?

The Mini BESTest requires the most specific equipment but is an excellent assessment for patients who are at slightly higher levels. You’ll need a 4” thick piece of Temper foam rated at medium density T41 firmness, a 9” box, and an incline ramp. For the incline ramp, you can use this aluminum step and keep two legs folded while extending the others. This can also double as a great tool for working on step-ups. For the 9” box, a 9” folding step stool is an excellent option that has the same physical dimensions as a box but is much more practical to carry in and out of patients’ homes. You should not use a standard Airex pad as it is very different in firmness and responsiveness compared to the tempered foam.
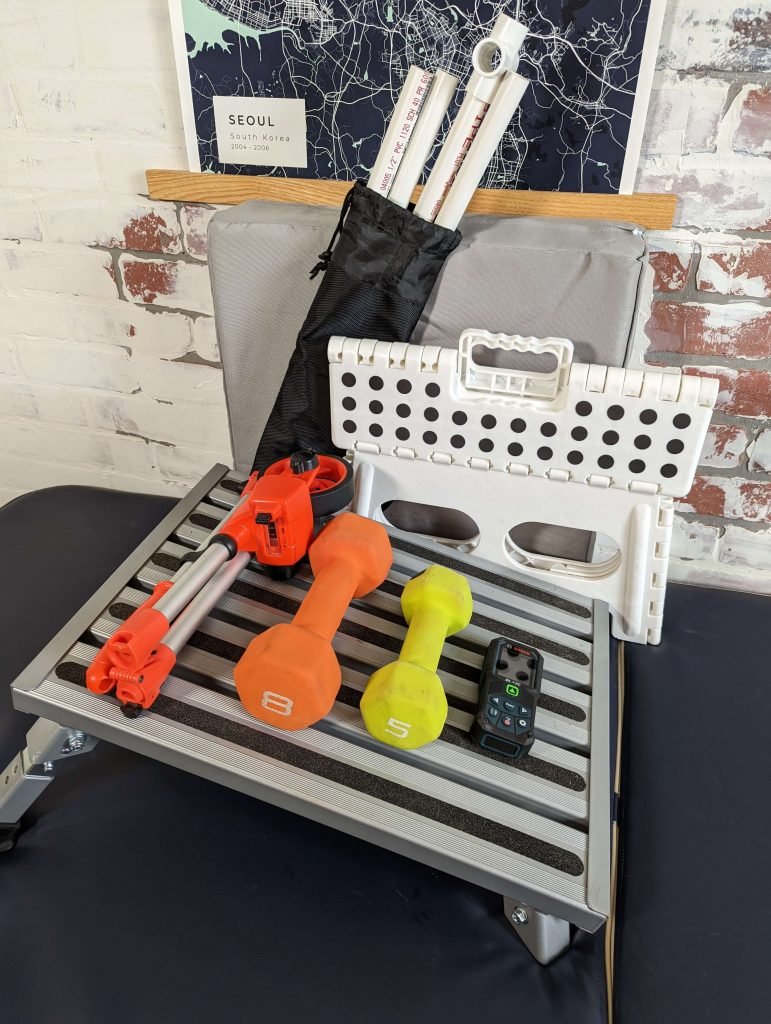

Equipment to administer outcome measures in home health
GetUpside – Free Cash for Home Health Workers

GetUpside – Free Cash for Home Health Workers

If you’re considering trying GetUpside,  please use my referral link for a 15 cent per gallon bonus.

Wear and tear on your vehicle and mountains of gas receipts can reduce the benefit of increased pay from working in home health. GetUpside incentivizes you to fuel up with its partners and rewards you with cash or gift cards for doing so. This simple home health hack can bring you an extra $20 a month for doing what you already do.

What is GetUpside?

GetUpside is a free mobile app that pays you for purchasing the gas you’re already buying. When you need to fill up, just open the app to view offers at nearby gas stations. “Claim” the offer that looks best, then when you arrive you just “Check In” and pay as normal. Within a couple days you’ll receive a credit in the GetUpside app which can be redeemed for a gift card to many popular companies, including Amazon, or you can opt to have a check mailed to you. Who doesn’t want a little extra cash?

How much money can you make?

The more you drive, the more cash-back you’ll earn. Many offers are 20 cents back per gallon. So if you put in 10 gallons you’ll get $2.00 back. If you use my link you’ll get an EXTRA 15 cents per gallon cash back on your first purchase.

As a home health worker it’s easy to determine how much cash you can earn. If you know your average miles per day, week or month, and the fuel efficiency of your vehicle. 2000 miles a month is fairly common for most home healthers. For a car with an MPG of 20 you can cash about $20 a month, for a 30 MPG car you’re looking at about $13 a month. This is for doing almost nothing extra. 

Refer friends to increase your reward

When you refer friends to GetUpside, you’re paid 1 cent for every gallon they buy and .5 cents for each of your referral’s referrals. There’s no limit on how much you can earn and there’s no experation of your rewards.

Over the course of a year, you can easily earn enough to cover a good portion of your Christmas gifts, or treat yourself to something nice. Buying gas without using GetUpside is like burning cash. Download it and get started today.

Home Health Pay Calculator – Make Sense of the Point Madness

Home Health Pay Calculator – Make Sense of the Point Madness

Who is this Calculator for?

This calculator is designed for all evaluating clinicians who are paid by salary in home health. This would include registered nurses, physical therapists, occupational therapists, and speech-language pathologists. If you are pay-per-visit, you already know your per-visit pay (of course).

How to make six-figures in home health?

This calculator helps you understand your per visit pay when you are paid by salary with productivity requirements, but if you’d like to understand the quality of a home health offer and be able to negotiate with evidence backed regional adjustments the Salary Sanity Score (SSS) is available exclusively in the Six-Figure Home Health Jumpstart Blueprint which you can learn about here.

How to Use the Home Health Pay Calculator

  • Use only numbers and decimals.
  • Enter your yearly salary.
  • Enter your weekly productivity requirement.
  • Assign point values to each visit type.
  • Assign the total time involved for each visit type in HOURS (e.g. “3.5” for 3 and a half hours for a SOC).
    • Be sure to include ALL tasks when determining the time required for each visit type – scheduling, driving, completing the visit, documentation, calling physicians, and communication in order to get the most accurate hourly equivalent.
  • Calculate!

Calculate Pay by Visit Type From Salary and Productivity


Visit Type Point Value Pay Rate Time for Visit Hourly Equivalent
SOC
ROC
Recert
OASIS DC
Evaluation
Re-Evaluation
Standard Visit
Discipline DC

How to Interpret your Home Health Pay Rate

Due to “points” being an arbitrary measurement, your most valuable information is the Pay Rate per visit type and the hourly equivalent.

I will attempt to gather averages to improve the usefulness of this tool going forward.

Home Health as a New Grad Physical Therapist

Home Health as a New Grad Physical Therapist

Passing boards and your state jurisprudence exam gives the ultimate feeling of accomplishment, but as a new grad physical therapist, landing your first job is often the most important choice and sets up the trajectory of your career.

Unlike our colleagues in medical school who are required to go on to a residency, as physical therapists, we are free to practice in any setting without additional training or certifications. With that said, the majority of physical therapists end up practicing in an outpatient orthopedic setting. Home health physical therapists actually only make up about 6.5% of the total physical therapy workforce. With that in mind, it’s unsurprising that very little is taught about home health in school. 

While most physical therapy settings foster collaboration with professional colleagues, as a home health physical therapist, you primarily treat patients independently. The closest collaboration may be via phone call or weekly case conference, but rarely do you have someone to bounce ideas off of or to request insight on disease presentation. Patients in home health are often medically complex with a variety of comorbidities. Given the nature of the job, it’s uncommon to secure a clinical rotation in the home health setting.

With little to no training for home health in school, few opportunities to train during clinical rotations, and with patients of high medical complexity, it’s often recommended to have 1-2 years of clinical experience before transitioning to home health. However, many physical therapists, including myself, have jumped straight into home health after graduation and have thrived in this unique setting.

While there are many factors to consider before entering this setting as a new grad, the following questions are excellent to screen if you may or may not be appropriate for home health. Can you answer “Yes” to all of the following questions?

Are you self motivated to stay on task and complete necessary work?

Flexibility in scheduling and work hours can be very enticing with home health, but it requires considerable time management and discipline to keep current on documentation and other associated tasks. Some visits in-home health require documentation of up to 2-3 hours outside the home.

Are you willing to use online and audio resources to continue learning specifically about geriatrics?

There is a wealth of information available with podcasts, ebooks, and online courses for treating the geriatric population. Just using the time while driving to listen to educational material can make a significant difference in your knowledge in this area?

Is geriatrics an area of interest to you?

Ask this question honestly. If you’re unsure, that’s okay. If you have a negative view of working with geriatrics, don’t go into this setting. Most people find that working with older adults is incredibly rewarding. Many patients in this area have vast amounts of knowledge and wisdom, not to mention incredible stories, which makes for engaging conversation and memories.

Are you willing to reach out to your supervisor or coworkers with questions?

Regardless of your knowledge and ability to research, you will, at times, need to reach out for suggestions and recommendations from other physical therapists, but also nurses, occupational therapists, or others. Don’t be the person that gets in the way of your patient’s success because you’re unwilling to get help.

Are you confident in your ability to assess for medical contraindications and interpret vital signs taking into account a variety of medical comorbidities?

75 percent of people age 65 and older have at least two chronic conditions. These may include Alzheimer’s Disease and related dementia, arthritis, chronic kidney disease, diabetes, hypertension, heart failure, and heart disease among others. Being able to quickly identify changes in conditions and provide accurate patient education is vital for the safety of your patients. You may consider additional review in this area before starting in home health.

Do you pass the screen?

If you’re able to answer yes to all five of these questions, you may be able to go straight into home health as a new grad physical therapist. This setting needs more young in the profession PTs who are eager to learn and advance care for older adults. For more information about home health as a physical therapist, check out my YouTube Channel.

Six-Figure Home Health Jumpstart Blueprint for PTs

Home Health Course - Established 2020

If you want to secure a Six-Figure income, skip the learning curve, and avoid a decade of struggle in home health you should check out my course targeted directly towards new grads getting into home health. Learn more.

Home Health Documentation – Faster and Smarter

Working in home health has many benefits including: flexible scheduling, higher than average pay, and considerable autonomy to name a few. What home health doesn’t offer is easy documentation. In fact, most therapists consider documentation the single most difficult part of working in home health. 

While treatment notes can take as little as 5-10 mins, evaluations and starts of care can take up to a few hours. The overwhelming burden of documentation outside normal business hours adds up quickly. 

Each patient encounter requires thoughtful and skillful documentation. Ultimately, documentation is the only thing demonstrating the skill provided during treatment. If the documentation does not indicate the skill provided, then upon review, payers may request return of payments.

Systematic documentation is key

Meeting all necessary requirements for therapy documentation isn’t all that difficult. By devising a way to quickly and accurately record what was done, why it was done, the response to what was done, and what the plan is going forward, you can save a lot of time. This is where documentation templates come into play. Using templates that can work for a variety of patients by changing key words and phrases, can greatly simplify the whole documentation process and save hours of time. 

Are documentation templates okay to use in home health?

As long as you are documenting what is required for each patient, whether or not you use documentation templates does not matter. The documentation you submit, must accurately describe what occurred and the skill provided during a visit. Even without using documentation templates, each provider will have specific language and phrases that are used over and over throughout their notes. Templates simply serve as a way to speed up the process.

Not only are templates okay to use, they can also serve as a reminder to obtain and record additional information you may have forgotten initially. Recording the patient’s response to treatment is often forgotten, but with templates, you can be sure to include details which can protect you in case of chart reviews or litigation.


How much time can I save by using home health templates?

When properly implemented, many providers are able to recover nearly half their documentation time. This is time they can then use to see more patients and make more money or spend time with family and friends.

Should I use only documentation templates?

While it may be tempting to use only templates for your notes, each patient encounter will have unique elements that should be included and won’t likely be part of any existing templates. Often times the patient’s subjective information and patient education are pieces that require additional written information.

Where can I find home health documentation templates?

I’ve compiled over 190 different documentation templates that can be adapted to meet each one of your patient needs. Documentation phrases and templates to simplify and justify skilled services covering: evaluation, outcome measures, assessments, treatments, interventions, orders, and call scripts. 

The future of documentation?

Ideally, regulations need to be reformed to reduce the burden of documentation on healthcare providers. Unfortunately, this is very unlikely to happen as even in the years where the Centers for Medicare and Medicaid Services (CMS) has claimed to reduce documentation burden, the result was actually a net positive in items being recorded. This was seen in an OASIS – D revision that removed some items, but added many more (GG items).

At some point, machine learning should help to reduce part of the burden by pulling information from available patient history and automatically importing it into your EMR.

To address the need for continued improvement in documentation efficiency, I am preparing to launch /DocKeys which combines dynamic templates and smart interpretation of assessments to drastically reduce documentation time. Head over to dockeys.io for the latest.


Affordable Alternative to Health Insurance

Affordable Alternative to Health Insurance

If you’re considering joining Christian Healthcare Ministries, please use my referral link.

Insurance premiums and deductibles have skyrocketed in recent years. It’s not uncommon to have a family premium of $900 with a deductible in the 8-10 thousand dollar range. That means you could spend nearly 20 thousand dollars a year before getting any significant benefit from your health insurance.

After our third child was born, my wife quit her job with a large bank and we were forced to find new health insurance. I looked over my employer’s options and realized not only was the cost astronomical for little to no benefit except in the case of a catastrophic event, due to the structure of these plans, a Health Savings Account wasn’t even an option. With all this considered I determined it wasn’t financially wise to allocate so much money every month.

I scoured the internet for other health insurance options, but only found similarly priced plans. One day, while listening to Dave Ramsey’s show, I heard a commercial for Christian Healthcare Ministries (CHM) and immediately started to investigate. I found that it was a healthcare cost-sharing organization that qualified as an acceptable alternative to health insurance under the Affordable Care Act.

After researching a variety of similar health shares, I realized that CHM was the best option for my family and would provide the best overall benefits. We’ve now been using CHM for nearly 4 years and have had thousands of dollars of healthcare costs shared by CHM.

How does Christian Healthcare Ministries Work?

CHM was founded in 1981 and has shared nearly $5 billion in medical bills. Nearly 40 years of bill sharing is an incredible track record. It’s important to note that CHM is NOT insurance.

“CHM is a membership-based, nonprofit ministry through which hundreds of thousands of Christians voluntarily share to pay each other’s medical bills.”

Three Plans to Choose From

Screenshot from chminstries.org

The cost can vary from $78 per month up to $172 per month per unit. A unit is one adult or all of the children in a family. For example, a typical family is 3 units. 1 unit for each adult and 1 unit to cover all the children regardless of number.

The bronze and silver plans are $78 and $118 per unit respectively and have per-incident deductibles of $5000 and $2500. These can be great options if you’re healthy and have very few costs. These may be especially attractive if you’re single. If you’re married, whether with or without children, I recommend the Gold plan which is $172 per unit and has a $500 threshold for full coverage of an illness.

Costs for a single medical condition typically cap out at 125K, but you can add an optional extra called “Brother’s Keeper” which provides unlimited sharing under the Gold Plan and a 100K per year increase under the other plans.

For my family, I have three units at the Gold level for $516 plus the addition of Brother’s Keeper which works out to approximately an additional $48 per month for my family bringing my monthly total cost to around $564.

The “Brother’s Keeper” program is actually very interesting because the cost will fluctuate based on the needs of the other members in the program. Meaning, if there are more people needing coverage above 125K, you may pay a bit more or you could pay a bit less. Knowing that the few extra dollars you pay go to paying necessary bills for other people, is actually kind of refreshing.

How does a Health Share Actually Work?

On the gold plan, if you have a single medical illness/incident that has a total cost over $500 then the entire cost is covered. If the total cost to treat an illness is less than $500, you just pay for it out of pocket.

Here are a couple of examples of the way CHM has worked for us over the past 4 years: 

When our last child was born since the total cost was over $500, the entire cost of having the baby was covered. This includes every visit with the OB, all the ultrasounds, testing, hospital bills, and follow-up visits after delivery. We literally paid nothing out of pocket to have a baby. Not only that, a few months after the baby arrived, we received a phone call from CHM congratulating us on the birth of our new child. How many insurance companies have called to congratulate you when they have to spend money on your care?

Another example that comes up periodically is when our children get sick and require an office visit and sometimes a medication. The total cost for this is typically around $50. Since this cost is less than $500 it is paid by us and is not shared by CHM.

What do you do when you Need Medical Care?

When you go to receive medical care, you inform them that you do not have health insurance and that you are cash pay. You can also inform them that you are a member of CHM as many providers are familiar with the program. You request cash pay discounts and shop around a bit to get the best price possible. If the cost is low, then paying at the time of service is typically advised. If the cost is high, you may ask the provider to bill you or put you on a payment plan. If the bills are very expensive, CHM will call and negotiate the bills on your behalf. Ultimately, you submit all the bills to CHM and get reimbursed with a check about 75-90 days later.

Some Things to Consider

CHM does not stop anyone from joining regardless of medical history. However, they do handle sharing for pre-existing conditions in a specific manner. If you have a condition that is actively being treated, that condition may not qualify for sharing initially so check their guidelines to see if there are any conflicts for you. If you have a condition that doesn’t qualify for sharing initially, you may be able to list your needs on the “Prayer Page” that comes out monthly. On this page, CHM members can donate specifically to meet these needs. I’ve seen tens of thousands of dollars donated directly to people in this situation.

CHM reserves the right to not share medical expenses that are a result of going against biblical principles.

“CHM members follow biblical principles with respect to the use of alcohol and abstain from practices inconsistent with a biblical lifestyle, including (but not limited to) illegal drugs, tobacco, nicotine, any smoking device (including but not limited to cigarettes, cigars, pipes, herbal cigarettes, e-cigarettes, vape pens, etc.), and sexual immorality (as defined in the Scriptures and expressed in CHM’s Statements of Beliefs).”

https://chministries.org/resources/faqs/

Some things I love about CHM

Unlike many health insurance plans, you can choose any provider you’d like. This way you can research and find the best care possible without concern for “coverage”.

You can be confident that your bills will be shared since CHM has been serving for nearly 40 years and has shared more than 5 billion dollars in medical expenses.

You can be confident knowing that your monthly contribution is not going to line the pockets of insurance company executives.

Based on my experiences using CHM, I wholeheartedly recommend it to anyone looking for an affordable alternative to health insurance. My family’s experience has been wonderful with no issues to report at this time.

How to Join CHM

If you’re considering joining Christian Healthcare Ministries, please use my referral link.

View my video review of Christian Healthcare Ministries Here:

How to add a laser line to a walker or cane

How to add a laser line to a walker or cane

As an Amazon Associate I earn from qualifying purchases. Read our disclosure here.

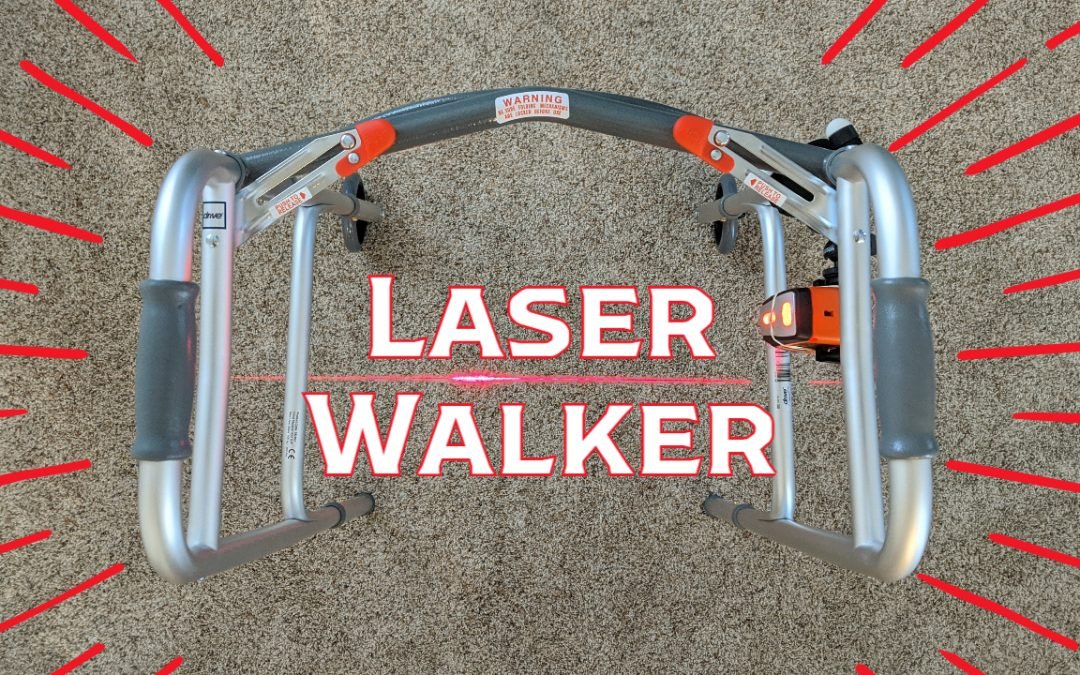
Difficulty initiating movement and freezing of gait is very common for those with Parkinson’s Disease. These issues often cause people to reduce participation in recreational activities. A variety of external cues can help to relieve these symptoms. One such cue is a laser line projection. The laser line provides a visual target for increasing step length. Improved step length leads to increased safety with ambulation and performance of daily tasks.

Typically devices such as the Laser & Sound Cue for the U-Step 2 cost upwards of $250 and can only be attached to the U-Step 2 walker. While the cost of a U-Step walker may be covered by insurance, it often is not. These barriers make the use of a laser for targeting step length almost unattainable by most people with Parkinson’s Disease.

For about $40, a homemade version can be made that easily attaches to any cane or walker. 

Here’s what you’ll need

Black and Decker Laser Level


Ubeesize Tripod


Cable Matters Zip Ties


Alternatively, you may consider getting the GripTight ONE GorillaPod (Amazon) for a more compact option.

Assembly

Place the laser level in the phone holder on the tripod and securely fasten it using rubber bands or zip ties for a more permanent application. Then attach it to the walker or cane in an area and facing a direction that will not impede stepping. For a standard walker, the area directly below the handle on one side is an excellent option.

Once attached, adjust the laser so it is oriented in the correct direction and the best position to encourage increasing step length and initiating of steps. Typically about half way between the front and back of the walker is a good place to start.

View the full video tutorial HERE: